Wednesday, 6 July 2011

Marvel final line up

Here are the last 2 Hydra agents. Rifle and pistol versions.
 The pistol was all GS apart from an inserted wire (paperclip) barrel and the rifle started out as a flat plasticard shape which has added GS and the barrel is also a paperclip.
 Ironman has had a re-sculpt from the waist down after my brethren at TMP gave me some pointers. I clipped him in half just above the belt and re-sculpted the legs. Happier with this version, although he does look a bit heavy on the hips, too many donuts?
Finally all 6 finished and based, I may even get round to painting them one day!

Thursday, 30 June 2011

Hulk 28mm scale but 40mm high


Here is the big green guy (oh the irony). Standing a massive 40mm in height. I've added a pic of him next to Cap to get a bit of scale. This figure has been ongoing since the beginning and compared to the others uses a lot of GS.
The face was a real struggle, this is the 3rd version, has a bit of a simian look about it but I'm happy with the hair which used the same 'picking' technique as the torn trousers (that's pants to you colonials). Musculature is still off but improved over earlier attempts. Didn't have a base big enough so had to make one.
The thing that irks me most about this figure is that he appears to be off balance and leaning backwards.

Tuesday, 28 June 2011

Hydra agent with heavy weapon 28mm

The first of a trio of Hydra agents. Scaled to be considerably shorter in stature than the heros. After trying to sculpt weapon out of GS I eventually saw the light and constructed most of it from some poly tube and a cocktail stick.

Monday, 27 June 2011

28mm Ironman Mk IV


Finished Ironman Mk V sculpt. The wife said "ooh a cyberman", maybe I should give up now. ;) Or 'delete' it?

Tuesday, 21 June 2011

28mm Captain America

Here is the finished 28mm Captain America sculpt. Please with the final product. After some great advice from some folks on the TMP message boards. I'm taking my time, using reference (character and muscle) and taking the time to get a better finish. Still lots of room for improvement, but I'll give myself a break as it's only my 3rd finished sculpt to date.

Sunday, 19 June 2011

28mm Marvels

I've chosen to sculpt some 28mm superheros next. Marvel universe, Hulk, Captain America, Ironman and a trio of Hydra agents. I've skipped the armature stage as I have nothing new to offer.
 Hulk, Captain America and Ironman. My sculpts will be based on older designs for these characters, 80's ish (my teens).
Hydra agents, with assault rifle, shoulder mounted heavy weapon and pistols respectively.

After making the armature I generally do rough feet to anchor the figure to the cork followed by pelvis and shoulders to strengthen the pose. The Hulk and Cap figures have the left over GS added. This was the end of the first application and I let the GS cure.

The Hulk is the most challenging as the amount of GS required makes it feel like a figure of a larger scale. I've found myself having to add small amounts at a time.
 Cap gets his underwear on the outside of his tights (as it should be) and boots. I seem to be more comfortable working from the feet up, is this the best way to work? Only time will tell.
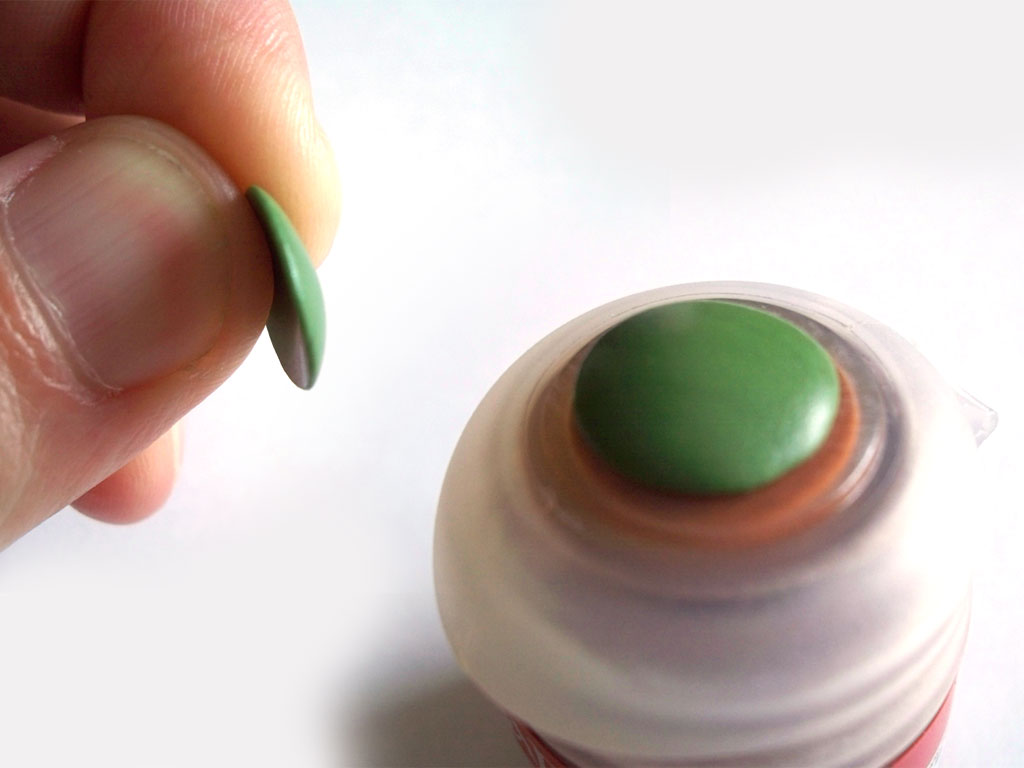
At this point I have also crafted a shield by flattening a blob of GS over the top of a pot of Citadel colour.

Ironman from the waist down. The stripes on his boots etc were a real struggle, I think I used the wrong tool in haste.


Finally the three Hydra agents, an exercise in creating a uniform look, in the most literal sense.

Friday, 17 June 2011

First sculpting attempts

Not posted for a while (I've been gaming online a bit of late), I must admit the painting of rows and rows of French Line have become a bit of a chore. I decided that the perfect antidote to repetitive painting was to try my hand at a bit of sculpting using Green Stuff or Kneadatite, how hard can it be right?
It turns out that it is hard, very.
I spent a lot of time lurking on forums, checking out other peoples sculpts and/or tutorials before deciding to take the plunge. I bought all of the necessary materials off of evilbay which amounted to:

  1. 12 inches of Green Stuff (or GS)
  2. Set of 12 sculpting tools
  3. 10 x 20mm corks
  4. 28 guage copper wire for making armatures
All of those items weighed in at about £15, which I thought was quite reasonable. I wasn't sure if 12" of GS would be enough, as i happens it was plenty. I wasn't sure if 12 sculpting tools would be enough, it was in fact too many as I find I'm only actually using about 2 or 3 of them and my trusty scalpel. Ten corks are plenty as they can be reused and the spool of wire I have should last about 2 life times.
I found GS quite easy to work with apart from one major element. Despite the fact that it is well documented throughout the interwebs, I was surprised at just how sticky this stuff is. The advice about having wet fingers and tools is about the best you can get, second only to the one about waiting a while after mixing a fresh batch as it is at it's stickiest at this point. I created myself a figure scale using some freely available Andrew Loomis proportion illustrations here, here and here. Printed them on a sheet at various scales, very useful for making the armatures etc.
I rushed my first couple of sculpts, I tried to do too much, too soon (like a giddy schoolgirl). It also means there are no WIP shots just the finished article.
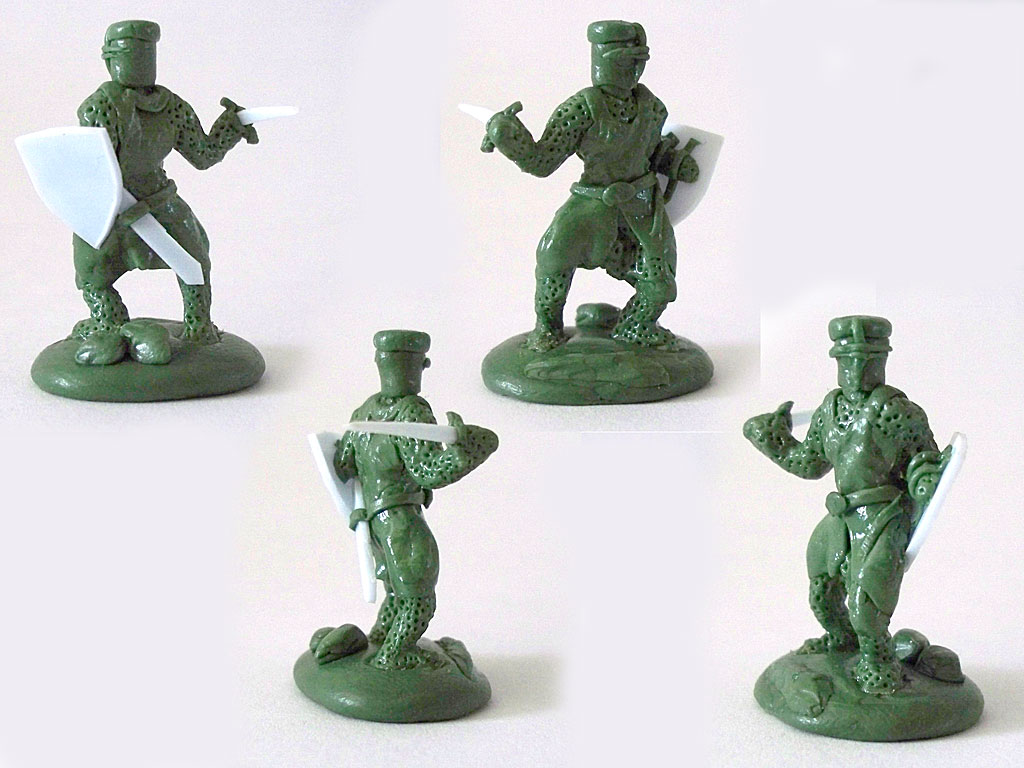
First attempt was a 28mm Knight (of no particular era). I chose a knight specifically as I could avoid sculpting fingers and face thanks to a closed Helm and mitted mail gloves. Shield, sword and scabbard are made from some plasticard scraps I had.
I'm legally obliged to say that the next sculpt is only loosely based on the wife as she has been constantly asking me if her arse is really that big (to all you men out there just starting out in a relationship with a woman, the answer should always be NO to that particular question).
This is therefore a 54mm sculpt of a 'generic' female figure, a first attempt at hands, hair and face and a massive learning experience.
I'm happy with the result of my first attempts and all painting has been put on hold so I can scratch my sculpting itch. I am currently working on a series of six 28mm superhero sculpts, I'm taking my time and will provide some WIP shots soon.
I've added my figure scale chart incase anyone finds it of use. Remember to print it at 100%.

Monday, 9 May 2011

Italeri French infantry, step-by-step

First I painted my French infantry blue...
Just kidding, I promised myself if I were ever to do a tutorial, or step by step I wouldn't be teaching anyone's Grandma how to suck eggs. I've included pictures showing the figures as they progress and I'll not be going into specifics about paint and colours used as everyone has their own favourite paint manufacturer. Having said I am about to completely contradict myself by talking about paint specifics.
I've given up buying cans of aerosol undercoat. Mainly because a money saving venture on my part resulted in a fortunate discovery. I purchased a cheap spray gun (Badger 250) for the purpose of undercoating. You'll notice I have avoided using the term 'airbrush' to avoid being reprimanded by the airbrush purists. Now filling these up with Citadel or Vallejo acrylics was going to get a bit pricey so I needed to find an alternative. My local shopping centre has a huge hobby superstore, with aisles of paints and brushes of every possible ilk. After wandering the shop for what seemed like minutes I happened upon a bulk pot of Acrylic by Daler Rowney called System 3. Says on the tub it's suitable for models, was a fair price and was in a spill proof bottle (essential for a clumsy oaf). I bought a 250ml bottle but its available in sizes up to 2.25 litres!
The good news is, it was a triumph, thinned nicely and covered soft plastics, hard plastics and cardboard well.
Stages 1-3, Red, White & Blue

One aspect of painting figures rarely discussed is the inevitable 'wobbles' or going over the lines if you like. I paint stages 1-3 and then correct any errors. Most mistakes made are because of inevitable hand wobbles (I think it's an age thing). I find it useful to rest the hand holding the figure or figures on the table and rest the little finger of my brush hand on my other hand to minimise wobble.
After stage 3 I tend to correct any errors as I go along, this prevents the figure getting too untidy.

On figures this small, painting hands and faces can be difficult, but it's worth doing a good job as good faces can give your figures character. I make sure my paint is a bit thinner than normal as it goes on a bit easier. I paint the back of the hand then fingers (not always successfully) then the opposite side, palm etc.
Faces are just a series of dots. I dot the nose, each cheek and then the chin/bottom lip. This gives a great 'Frenchman with big moustache' look. You can paint the top lip for a 'slightly younger Frenchman' look that is ideal for a bit of variation. Or you can paint that top lip grey for a 'really old Frenchman' or Old Guard look.

Stages 4-6, detailing.

I start quite untidily, and finish with as much detail as possible.
The last stage is always metallic details. Gun metal, silver and gold.

Hope one of these tips is of use to someone. I have picked up many useful tips from the internet over years, time to return the favour.

Saturday, 7 May 2011

Waterloo terrain

I'm currently busy finishing my final six French battalions, so I though I'd take this opportunity to show you the terrain pieces I have started. There are six in all, two representing the most famous buildings of that battle and the other four generic pieces to be used for the other points on the battlefield (Plancenoit, Papelotte, La Belle Alliance etc). I have completed one piece just as a test (which is an annoying habit I seem to have developed, buy figures paint one as a test, move on).
La Haye Sainte 150x90mm

Hougomont 200x150mm

Generic 100x100mm piece, the only one completed so far.

Remaining 100x100mm pieces.
Each of my infantry bases is 60x20mm ( 60x80mm for a full battalion)

Tuesday, 3 May 2011

French Italeri Flags - a quick WIP

I was disappointed with the Airfix French as a whole. The Italeri French on the other hand are amazing. So much so that I'm actually quite glad the Airfix figures were so poor. I still had to do my normal flag conversion on the HQ. The Italeri figures provide an officer, drummer and Flag bearer x3 in every box. I just trimmed off the existing flag, made a hole in the base and glued a straightened paper clip into place using PVA glue. Two or three applications should do the trick.
 These are best 1/72 figures I've painted so far, although some of the Zvezda figures look like worthy purchases as well. I may post a more in depth WIP as I paint some of the remaining French.

Les Bleus

My intention is to have ten Battalions of French to oppose my British. To date four are finished. These  four are made up of the Airfix Figures that were included in my Waterloo set. They range from good to bad to downright unusable. The good are the Guard figures, well sculpted, good moulding, a few strange poses and a dodgy Officer's sword. The bad are the French Infantry, poor sculpting but can be saved by some clever painting. The poses are fine. Unfortunately some of the figures are so badly moulded that their limbs are so thin they looked like me on a beach holiday. I had so few usable figures that I was forced to make up the numbers using a surplus of 'shoulder arms' figures from the French Artillery set. Having said that I'm not unhappy with the final result and nostalgia for the bow-legged hunchbacks that served in my childhood 'Boney' army goes a long way.
So the final line up will be seven line, one light and two Guard Battalions.
1st Corp, 2nd Division, commanded by General Donzelot
 13th Light Regiment

1st Corp, 3rd Division, commanded by General Marcognet
 45th Regiment of the Line

Imperial Guard Corp, 1st Division (Old Guard) commanded by General Friant
1st Grenadier á pied 
 1st Chasseurs á pied
The remainder of 1st Corp, 2nd and 3rd Divisions will me made up of the fantastic Italeri French Infantry.

Monday, 2 May 2011

10 British Battalions

Having decided on how I'm going to base the figures the first Regiment I decided on was the 44th East Essex. The reason being I am an Essex man, born and bred. I'm actually from South Essex, but we all know there was never any South Essex Regiment... right?
This eventually led to me deciding to paint Wellington's reserve, Picton's Division minus the Hanoverian element. The inclusion in the Airfix set of French Guard figures would eventually lead to me add the two Guard battalions of Maitland's 1st Brigade. Clearly the Airfix set didn't have enough figures or figures of the right type to complete this task. I also decided at this stage to replace the mini skirt wearing Airfix Highland Infantry for the superior Esci/Italeri product. I also added the Revell Rifles and the Italeri British Infantry 1815 which is a mix of Guard figures and Stovepipe Shako wearing figures of the North Gloucesters (perfect).

8th Brigade, commanded by Major General Kempt
1st Battalion,  28th North Gloucester Regiment (Italeri)
1st Battalion, 32nd Cornwall Regiment (Airfix)
1st Battalion, 79th Cameron Highland Regiment (Italeri)
1st Battalion, 95th Regiment 'The Rifles' (Revell)

9th Brigade, commanded by Major General Pack
3rd Battalion, 1st Foot The Royals Regiment (Airfix)
1st Battalion, 42nd Highland Regiment 'Black Watch' (Italeri)
2nd Battalion, 44th East Essex Regiment (Airfix)
 1st Battalion, 92nd Highland Regiment 'Gordons' (Italeri)

1st Brigade, commanded by Major General Maitland
 2nd Battalion, 1st Foot Guards (Italeri)
 3rd Battalion, 1st Foot Guards (Airfix & Italeri)

Sunday, 1 May 2011

My 1/72 Waterloo project

My most time consuming project of late has been a Waterloo based project in 1/72 soft plastic. This is due to my prior purchase of the Airfix Waterloo set. I had an existing set of the British Infantry bought on a whim and this was to be the starting point of the collection.
Here is the contents of my Waterloo box in various states of paint, there is also some scratch built scenery/terrain pieces (not shown here I'll save that for another post) that are to ground scale not figure scale. I decided to base the figures according to a set of Wargame rules, just in case I ever found a fool friend to play this scenario with me. I settled on Jon Linney's Fast Play rules that I found at Free Wargames Rules.
I chose these rules for three reasons:

  1. They're free
  2. They're fast play
  3. The basing system allows me to display my battalions in column, line and square
There are 16 figures to a battalion, 4 figures to a base. The bases are 60x20mm. I'm shooting for 10 battalions each of British and French. The British represent Wellington's reserve, the 8th (Kempt) and 9th (Pack) Brigades (excluding the Hanoverians for now as this would mean an additional 8 or so battalions to paint), plus two additional Guard battalions. The French will be made up of Donzelot and Marcognet's Divisions plus two additional Guard battalions. To date I actually have all of the British battalions painted. The figures are as accurately painted as I can research on the Internet or with my limited (not really I've got loads) library of books. I do find, however, that the Mont Saint Jean website is a fantastic Waterloo uniform reference if you don't mind the text being in French.
Each base is painted to represent either Grenadier, Centre or Light companies (or their French equivalents). I realise this might not be numerically accurate as there are normally more centre than flank companies, but I'm not that anal... yet!
The figures are also painted to accurately portray these company types with the correct plumes or epaulets. Because of the small sizes involved I have decided to only use one standard, which isn't a problem for the French but The British tended to carry 2 colours (flags). I have opted to use the Regimental Colours for a bit of variety as the King's Colour was generally a variation on the Union Flag. All my flags are laser printed, free from the excellent Napflags.